[act]Gives *dpm* a pen[/act] Here's the actual Tute. :) It got a bit long, I thought it best to introduce it first...
Given that you all seem to have a variety of experience with Illustrator, I'm starting with a brief introduction to the main tools I use, and the basics of drawing with the pen tool. I will then go into my tutorial of how I make the Ober Bunch pics.
I don't tend to use my drawing tablet while using Illustrator, but it works fine either way.
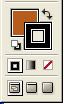
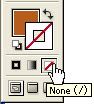
Throughout this Tute I have included a variety of images. The most directly relevant images are visible on the page – some can be clicked to view a larger image. In case you're unclear on what things are, I've included links to images of the tools and where to find various options and functions. (Click each item to see where it's located.)
The basics of Illustrator The main tools of the trade are these:
The
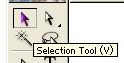
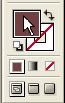
Selection tool, the
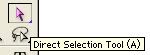
Direct Selection tool, and The Pen tool (
the standard Pen Tool,
Add Anchor Point,
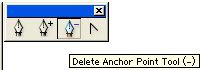
Delete Anchor Point and
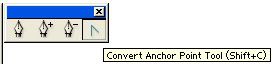
Convert Anchor Point).
The basic
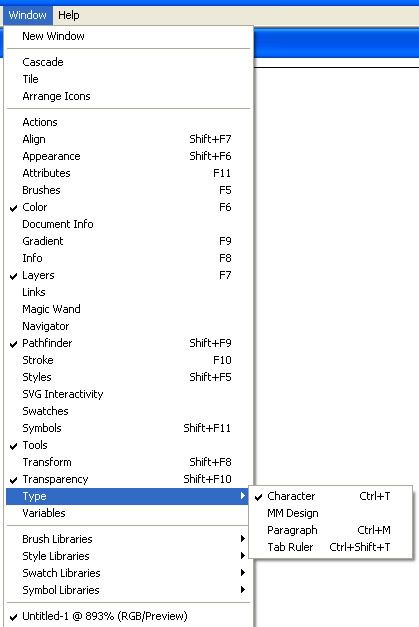
Windows I always have open:
Tools, Layers, Colour, Transparency, Character, and the Pathfinder.
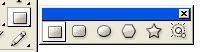
Making shapes:You can create simple shapes using the
Shape Tool, or you can draw a shape by hand using the Pen Tool.
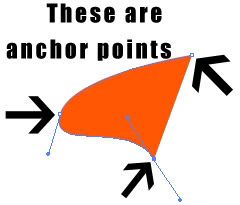
Each shape is made up of a group of
Anchor Points, connected by lines. When you use the Pen Tool, you are drawing the Anchor Points. The Anchor Points can later be altered using the Direct Selection Tool, which will in turn change the shape.
Introduction to using the Pen Tool: The Pen Tool is central to my technique. It takes a bit of experimentation to get used to it, but the main thing you need to know is that you can't hold the button down and have it draw a line behind the cursor. Instead, you're drawing the points that define the pen's direction. (The Anchor Points.)
If you just click with the mouse (or tap the tablet with the pen), you'll end up with a shape with straight edges.

To complete a shape you just need to click on your first Anchor Point with the pen tool. (If you stopped partway through drawing a shape, you'll need to click on an open end to continue the shape, and then click on the anchor point at the other open end to close the shape.)
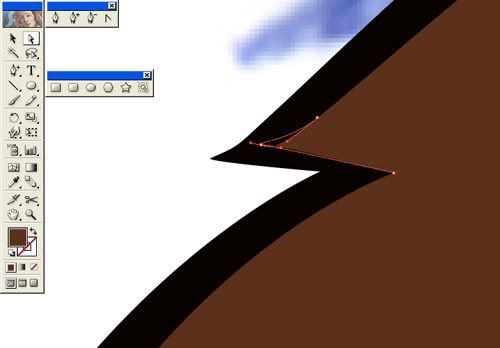
If you click and then hold and drag the cursor, the Anchor Points will become curved.

The above image looks like this once you release the mouse cursor:

You can choose the direction of the line while holding the mouse cursor, or if using a drawing tablet, just keep the pen against the tablet while choosing the direction of the line.
The Direct Selection Tool can be used afterwards to change the direction of these lines, and therefore change the shape of the object. I tend to make the basic shape I want, and then use the Direct Selection Tool to tidy up – it's a lot easier this way.
If you're still confused by the Pen Tool, you should probably watch this
video" >~Link~ tute on YouTube first – it's a little wordy, but seems helpful.
Making an Ober Bunch image:I personally hate the
default outline that Illustrator uses, so I
turn this off and make the outlines myself using the Pen Tool – I find that it gives the shapes more character.
It's always easiest to start with a sketch or drawing, however rough it may be, as it gives you something to work from.
Step 1. Make a new file (100 x 100 pixels for an avatar). Open the jpg file of the scan, and use the Direct Selection Tool to drag the image into the new file.
Resize the scan using the Direct Selection Tool, holding down Shift to keep the image to scale.
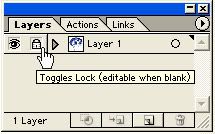
Step 2. Use the Layers Toolbar to
lock the sketch layer. It makes everything easier.
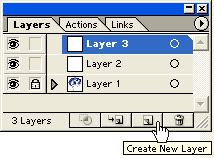
Step 3. Using the Layers Toolbar, make a couple of
new layers, and click on the top layer to use it.
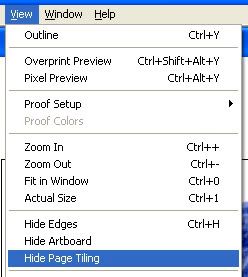
Step 4. At this stage I usually go to the View menu and
Hide Page Tiling. Page Tiling is not useful for images that won't be printed, and it gets in the way.
Step 5. Use the Ellipse Shape Tool to make an oval shape for Matthew's head.
 Step 6.
 Double click on the
Fill colour and choose a colour for the skin.
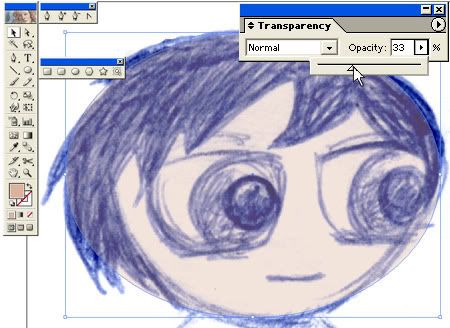
Step 7. Change the Transparency so you can see the sketch.
Step 8. I often combine the Shape Tools with the Direct Selection Tool. Use the Direct Selection Tool to move the Anchor Points to match the shape in the sketch.

You can also use the Direct Selection Tool similarly to the pen tool, to change the outline of the shape. (Just click and drag the point coming off the anchor point until the outline is the shape you want. You may need to adjust more than one point to get the shape right.)
 Step 9.
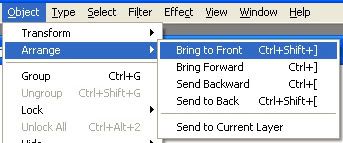
 To make the outline of Matthew's head, just copy and paste the head shape, and change the Fill colour to black. Resize it using the Selection Tool, and tidy up the shape using the Direct Selection Tool. Note: you will need to
move the skin-coloured shape to the front.
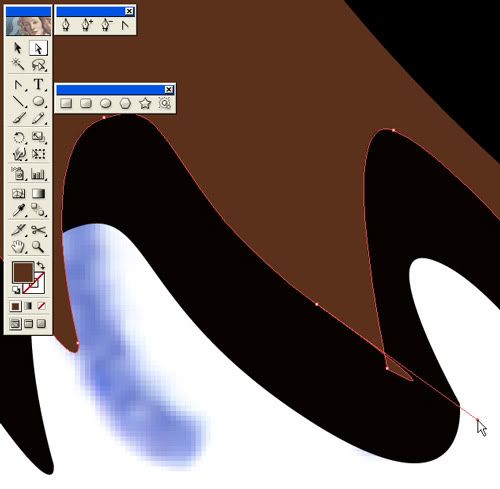
Step 10. It's time to start Matthew's hair. Use the Pen Tool to draw an outline for a section of Matthew's hair.
 Step 11.
 Choose a colour for the hair, then use the Direct Selection Tool to fix any problems with the shape outline.
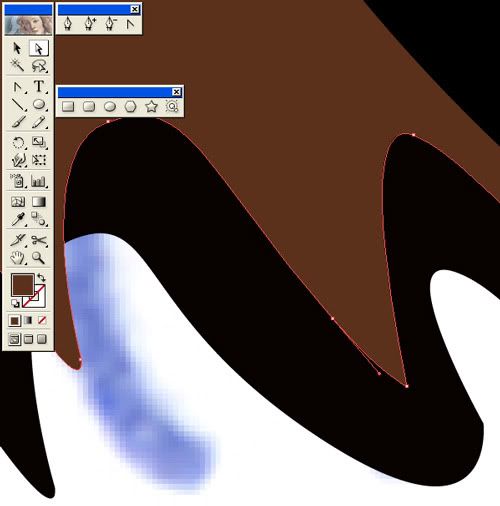
Step 12. Use the same technique to finish creating the basic version of Matthew's hair. You should end up with something like this:
 Step 13.
 We will now make Matthew's eyes. You may wish to use a new layer - if so, just lock the layer you're on and click on the next layer. Start with the
Rounded Rectangle Tool to make the basic eye shape:
 Step 14.
 The Rounded Rectangle has two anchor points at each side. You can delete one of these using the Delete Anchor Point Tool. (Just click on the Anchor Point you don't want.)
 Step 15.
 The image will now look something like this:

Continue to use the Direct Selection Tool to shape the eyes.
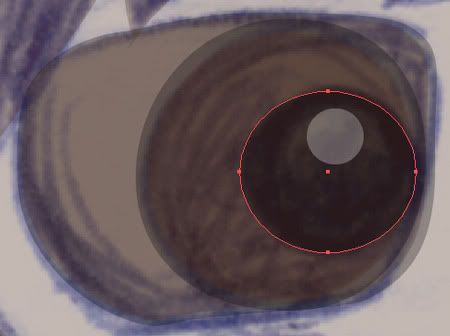
Step 16. Complete the eyes using the Ellipse Tool and the Direct Selection Tool. (Here's a few steps of what I did –
One,
Two and
Three.)
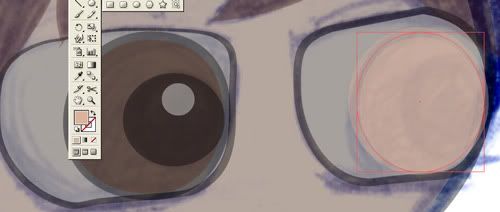
Step 17. To make the outline of the hair, again copy and paste the image and make it black

Use the Direct Selection Tool to tidy it up (
One,
Two and
Three).
You may need to add or remove some Anchor Points. To add an Anchor Point, just use the Add Anchor Point Tool, and
click on the outline of the shape.
An important rule of thumb is that if you're having trouble changing the shape of an object, you probably have either too many or too few Anchor Points. You want to be able to control the line as much as possible. Basically if it's getting weird bulges you may have too many Anchor Points, but if you're trying to adjust a section and it's changing too much of the shape, you probably have too few. You'll get to be able to see this for yourself.
Step 18. If you have only used one layer so far, you should definitely use a new layer for Matthew's body, then use the above techniques to make the body:
 Step 19.
 Set everything to 100% transparency, then make a new layer behind the others. (You will need to hide the scan, or make this layer just in front of the scan.)
Step 20. Make a square that's 100 by 100 pixels and choose a colour, and you've got a simple background.
Step 21. Use "Save for Web..." to save a jpg or png of the image, which you can use as an avatar. Make sure you also save your image as an Illustrator file, in case you want to make changes later!
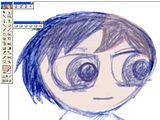
Here's my finished Matthew:

...and a couple of variations:

and


